
Making an Impression
Dental impressions are used to create a highly accurate replica of a dentition. They are used to plan dental interventions, whether it be for safety and prevention—such as mouth guards for contact sports—or more serious dental procedures, such as correcting malocclusions, restorations, and prosthetics. As such, their high precision makes them the choice method for dental professionals.
The Classics: More Bite Than Bark
The classic method typically involves a fast-curing polyester that is injected into a horseshoe-shaped tray that comfortably fits into the mouth. The tray can be molded for the top or bottom teeth, or both.
This creates negative space for the patient's teeth, from which a "positive" is formed using a special plaster. The positive is then scanned optically and converted to an STL file for further processing. This is time-consuming and roundabout, since we are essentially using a positive (the patient's teeth) to create a negative to create a positive to scan.
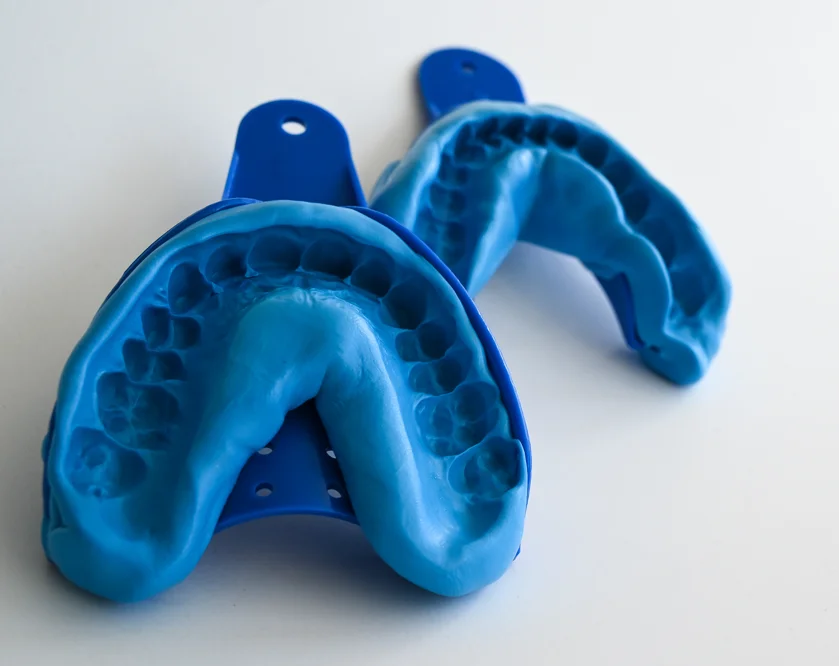
Classic dental impressions—don't they bring back memories?

The classic method of creating an STL file of teeth
But what if there was another way to avoid a good chunk of these steps?
VGSTUDIO MAX can cut out the middleman of a plaster positive by just working with the negative impression. It just takes a bit of CT magic! 3D-CT, that is.
VGSTUDIO MAX can be used to produce a clean mesh of a dental impression for digital processing in the dental lab. More specifically, it extracts the teeth and the surrounding gums, which saves time and effort in creating and re-scanning a positive model.
The Challenge
The task is a familiar one for VGSTUDIO MAX: determine the surface of a scan and create a mesh from it.
The real challenge, however, lies everywhere else. For example, there is a wide variety not only among impression materials, shape, and trays, but also in scanning conditions and CT systems. There is also the question of impression type (such as full vs. half, or single- vs. double-sided).
Then there is the lab-required maximum mesh file size of 10 MB, which corresponds to roughly 200,000 triangles. You read that right: megabytes. At first glance, this may seem out of date and contradictory to the level of detail we want. However, this limit ensures that further processing can be performed on simple, standard hardware. It also keeps the data storage footprint at a reasonable level. As we all know, with around-the-clock work, data can accumulate very quickly.
This brings us to the time component. A large lab using CT can achieve a scan cycle of 15 seconds, which means up to four scanned impressions per minute. This speed should be maintained in further STL creation.
In short, we are looking for a robust, fast method with the highest precision and the smallest file size.
Join us as we accept this challenge and find a method to meet these demands—without biting off more than we can chew.
VG Solution: The Overview
From a purely technical standpoint, we need to determine the surface of the entire object and remove from it all irrelevant, memory-consuming areas. Once we've got all that, we need to create an STL from it.
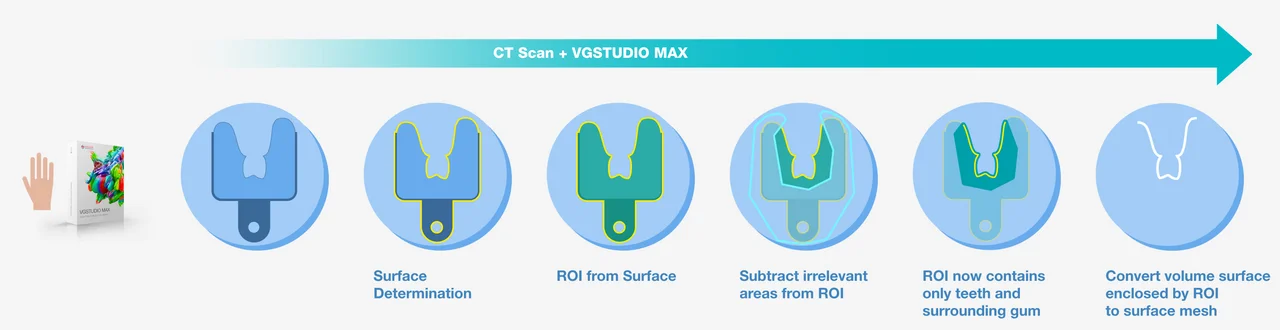
Translated to VG-Speak: create ROI from surface, followed by a few precise cuts to cut away the outer areas. Then convert to surface mesh. If we were doing this job manually, this is how we would proceed
So far, so good. The method is robust, and the data quality is fine. But in 15 seconds?
This calls for automation. And macros. They are fast, work silently through the process, and present their results at the end. But are they robust enough for the job?
Not yet! Remember, there is a wide range of data sets coming in. Unfortunately, that means a simple approach—like the lasso—no longer works in automated form. A different solution is needed.
Fortunately, we have something like a special in-house unit for these cases. Our colleagues in Technical Consulting have been tinkering with this question for one of our customers and have come up with a clever automated solution.
So What's the End Goal?
The goal is simple: converting data on only the teeth and gums to a surface mesh and exporting it as a handy STL file. But getting there is the adventure!
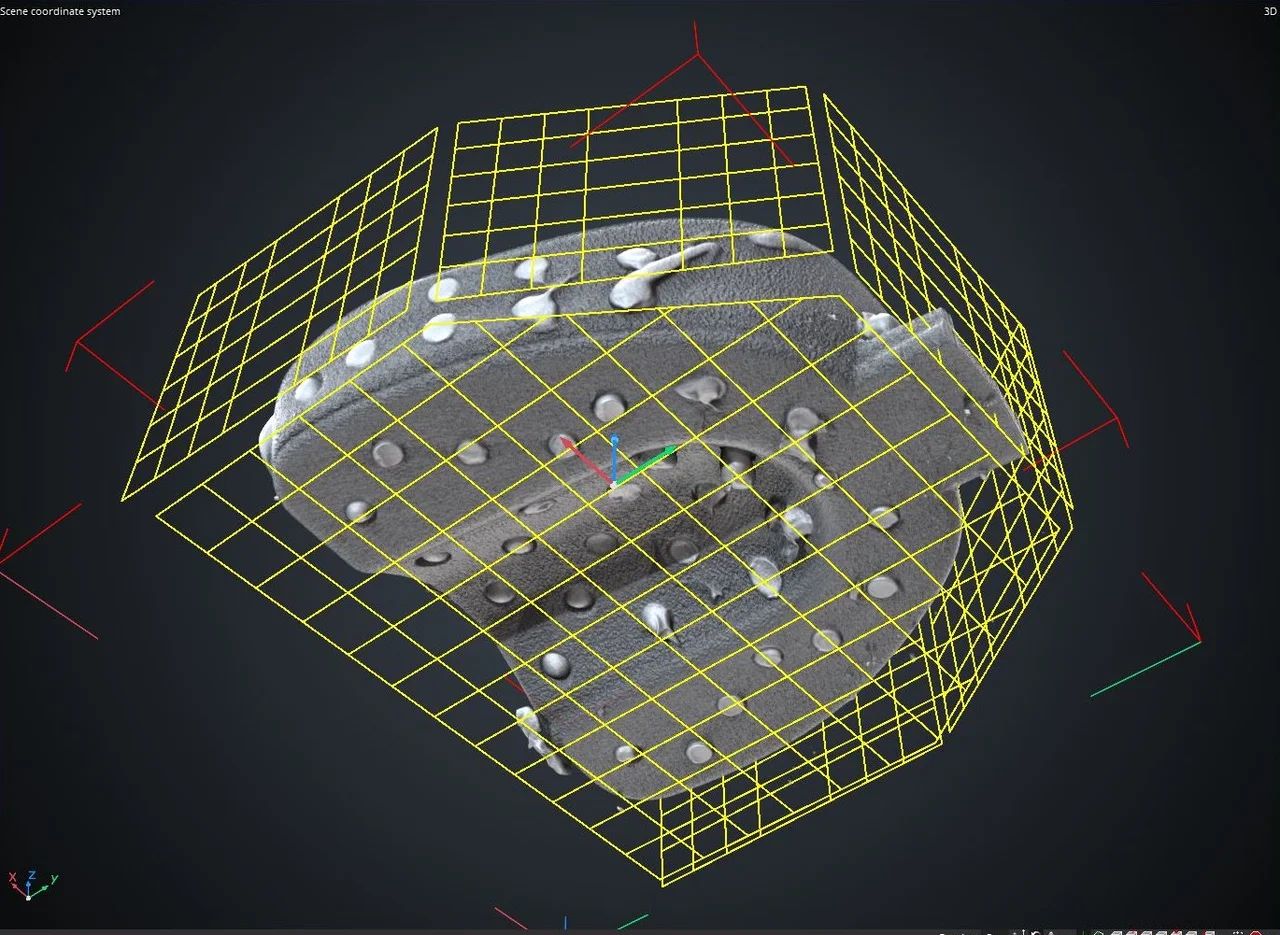
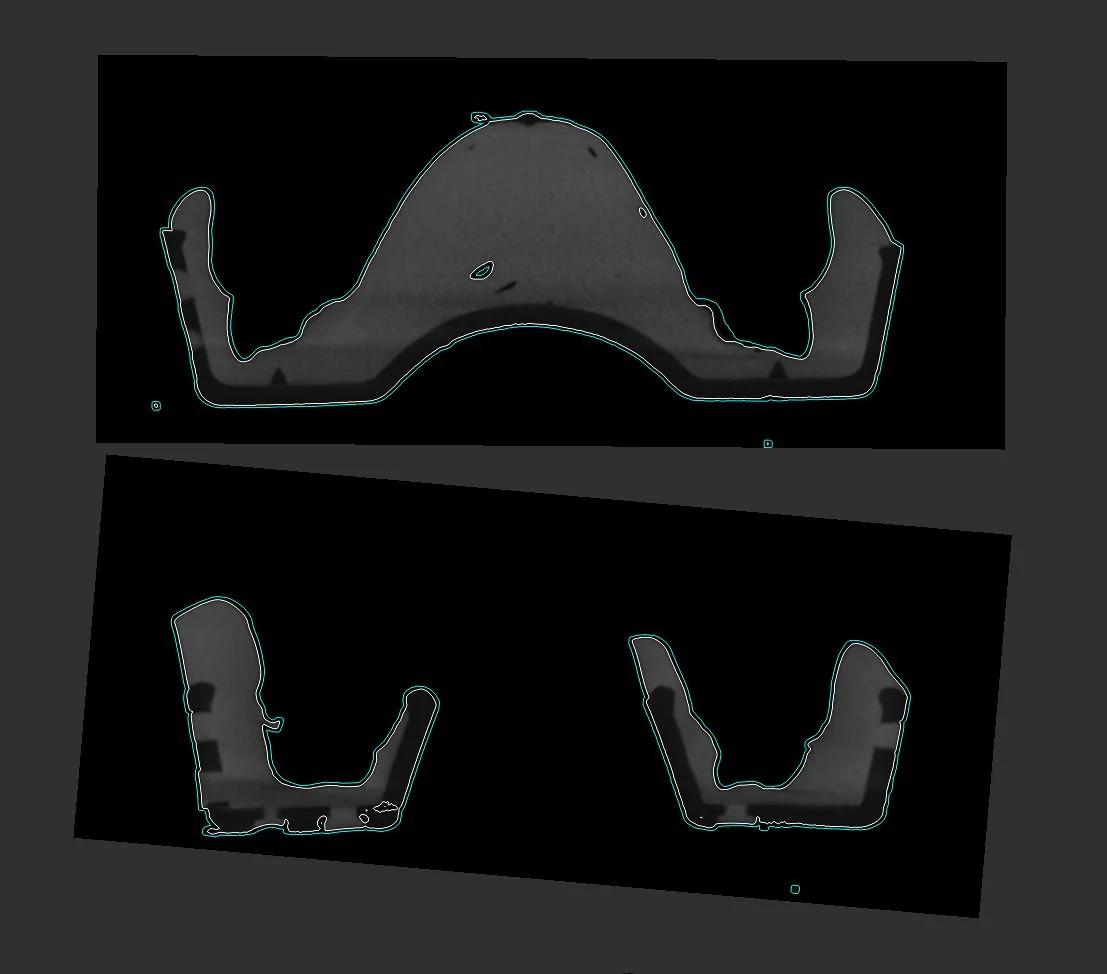
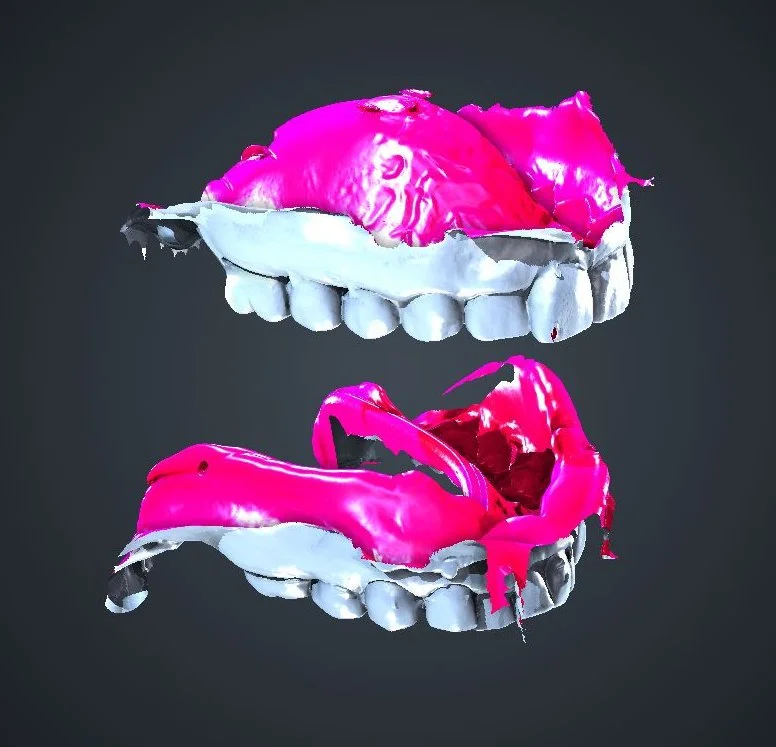
Before we begin, as a reminder, this is what we're dealing with:
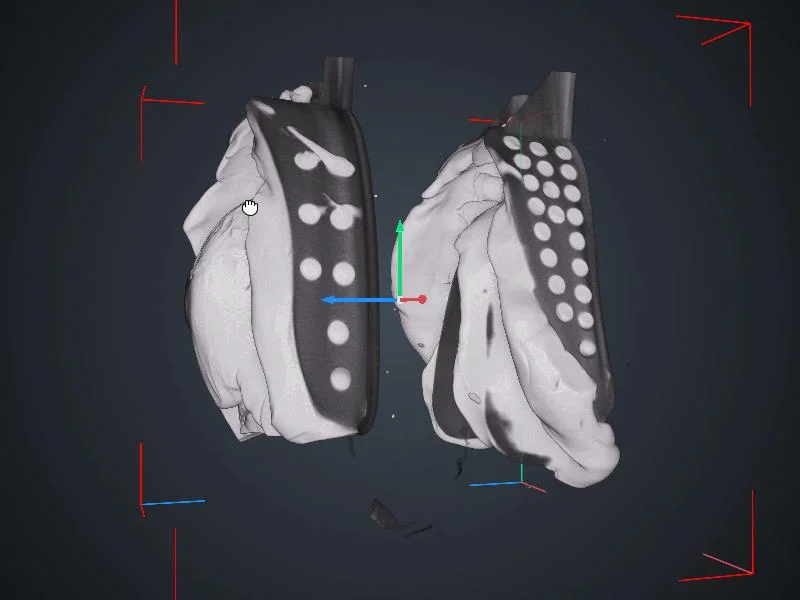
The data set in all its glory
What we see when we open the data set—so much potential!
Ready, Set... Automate!
Now that we know what we want, let's talk about how to get there.
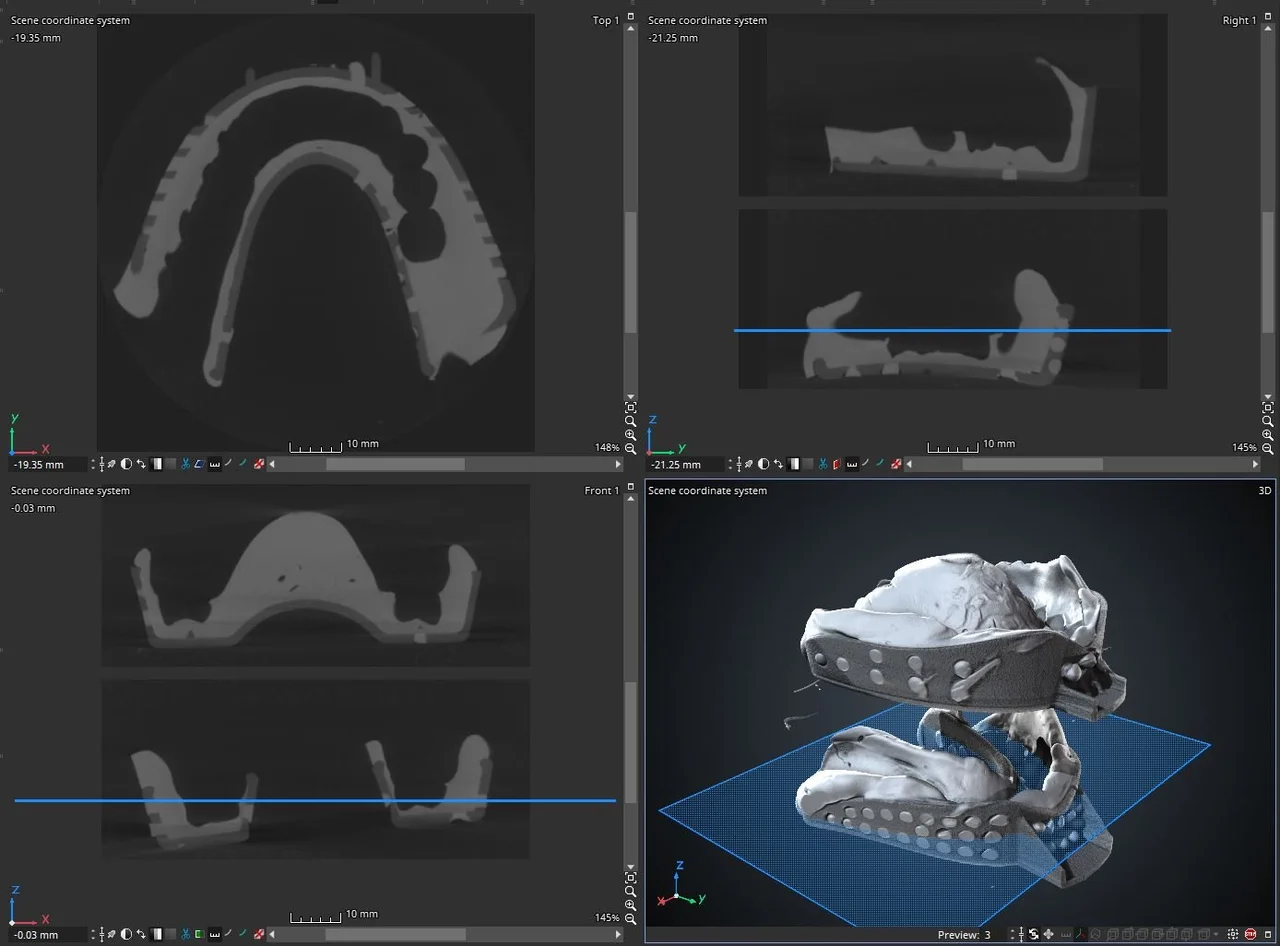
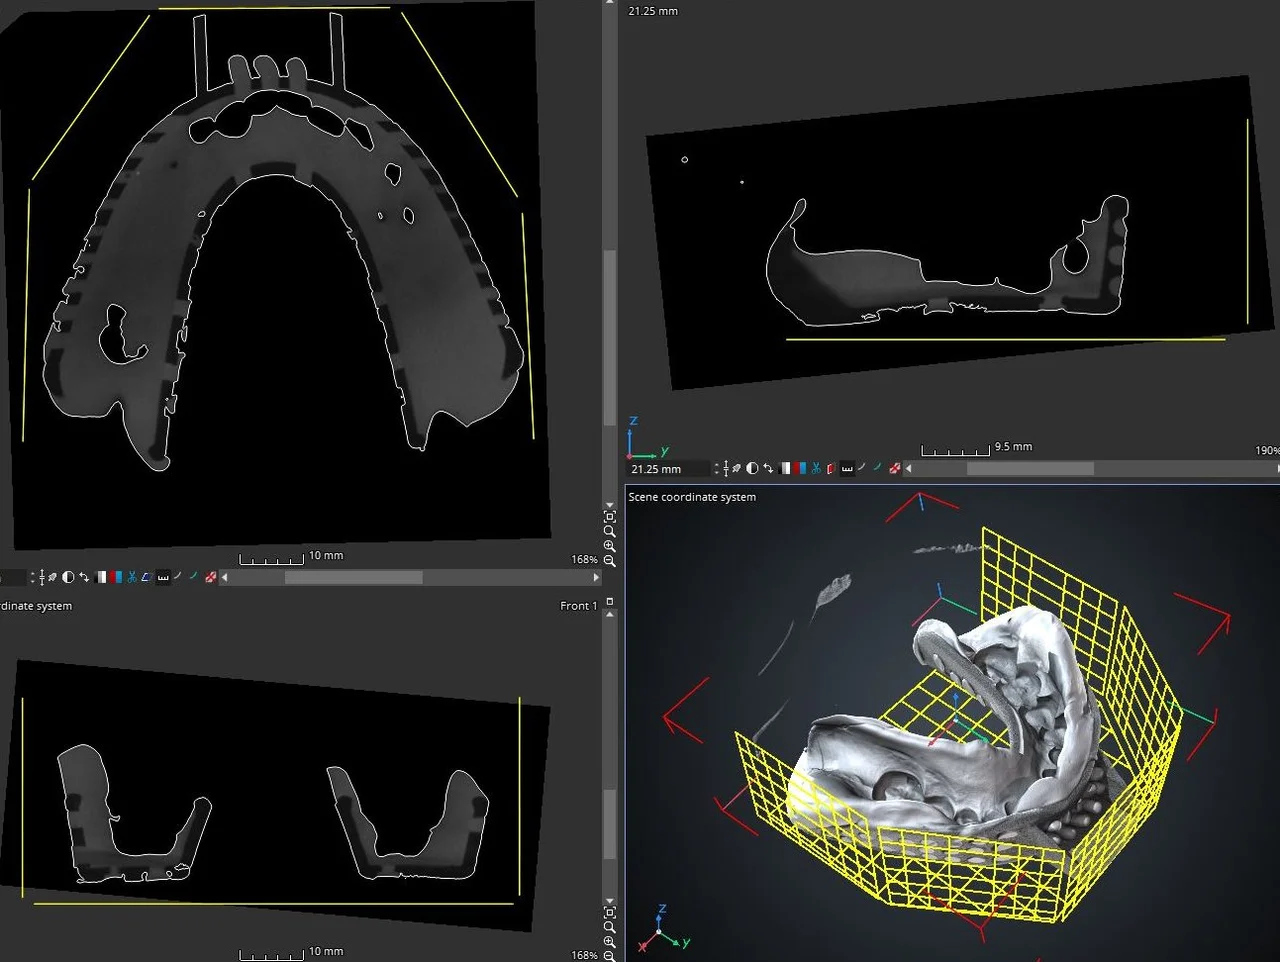
First, we need to import ROI templates with two rectangular ROIs, which conveniently store position info during export. This makes it easier for us to split the scanned object into upper and lower parts.

Import a template with two generously set ROIs to extract and address each individual component
Then we extract the ROIs to create volumes out of them. We just need to perform a quick surface determination on the new volumes.

Perform a surface determination on the extracted ROIs
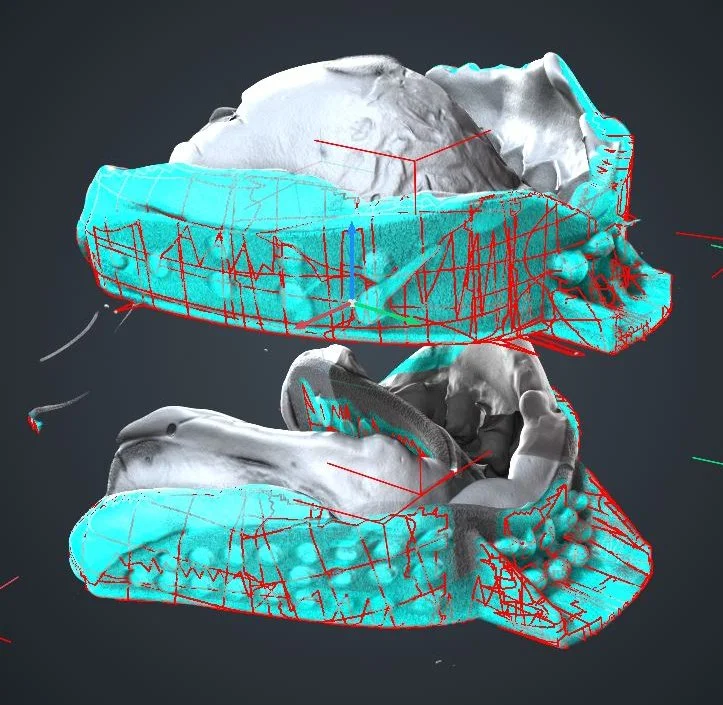
This allows us to (roughly) align each object (for example, to an imported reference STL), which sets a more ideal stage for automatic segmentation:

Import two meshes of the horseshoe to align and fit both extracted ROIs to the imported STLs
After that, a best-fit registration is in order:

Use best-fit registration to align against the imported horseshoe meshes
Now that we've cleaned up a bit and set the stage, it's time to reveal our master plan: to create an ROI that encompasses the entire dental impression—sans unnecessary bits, like overhang and the horseshoe itself!
This is where freeform surfaces come in.
The Magic of Freeform Surfaces
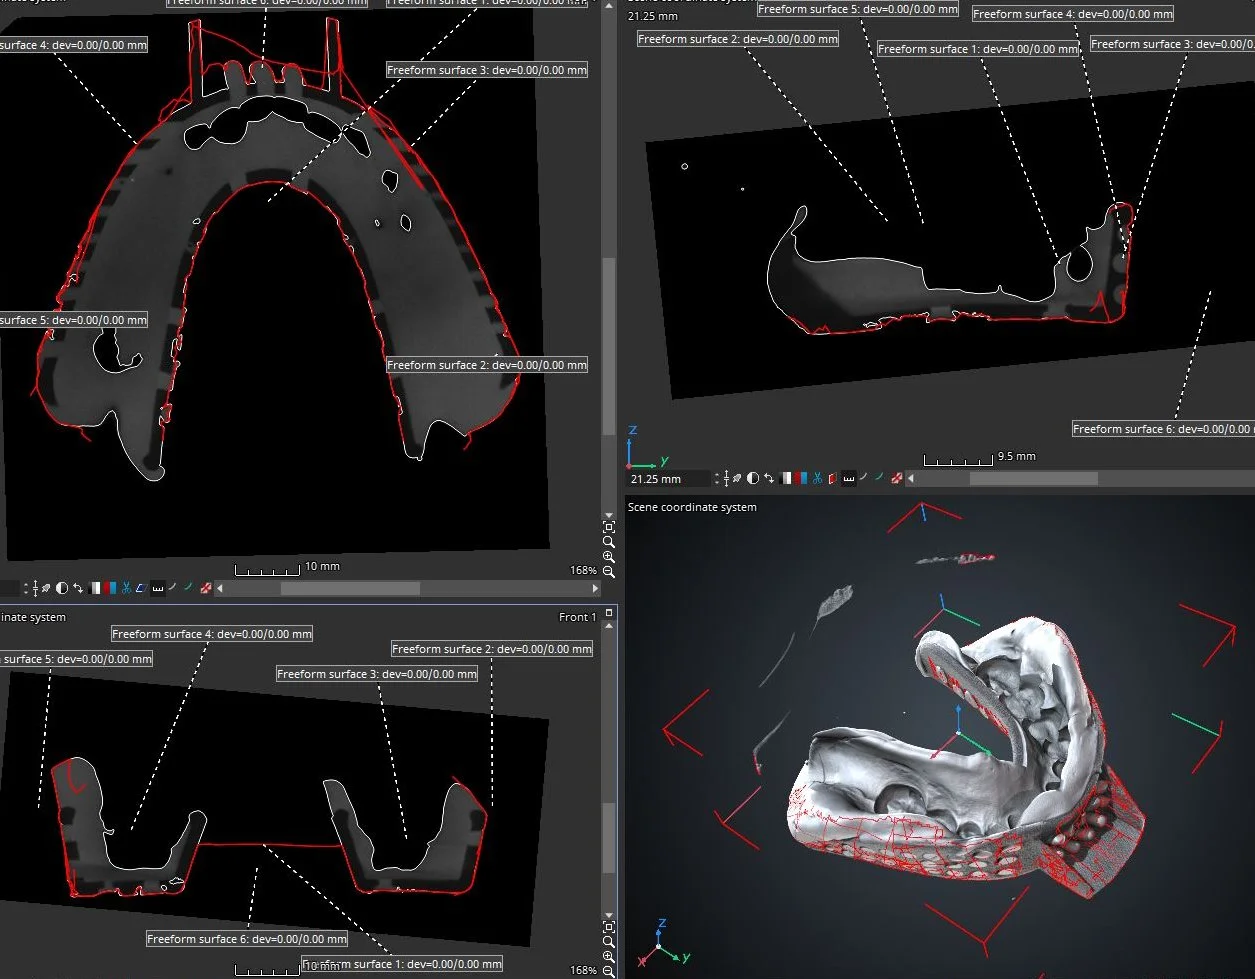
Now comes the neat VG trick: we load a measurement template with freeform surfaces, projecting them from all directions onto the outer surfaces we want to remove.
By importing a freeform surface template, we are essentially unleashing a wave of fit points that will automatically latch on to the actual surface of the horseshoe.
Import measurement template with freeform surfaces on the upper section...
...and fit them to the object's surface
Rinse and repeat! Now import the measurement template with freeform surfaces on the lower section...
...and fit them to the object's surface
From each volume, create an ROI and dilate
All the pieces together form a new, fractional surface, which we can use to peel away from our surface.
We can create an ROI from the freeform surface and subtract it from the ROI of the surface determination we had performed previously. With that, we are left with the imprint data, and from that, we can create a mesh.
Create an ROI from the freeform surfaces
What's left after subtracting from the "ROI from volume" is teeth, gums, and just a tiny bit of overhang around it:
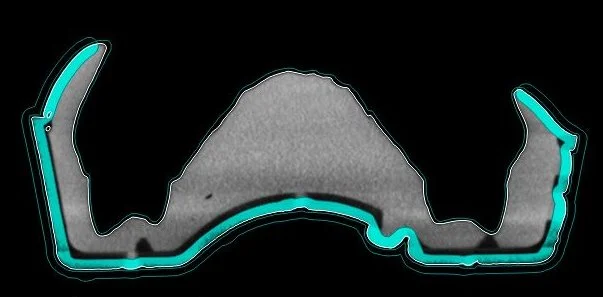
Subtract from the "ROI from volume"
Finally, we can convert that to a surface mesh and export it as a handy STL file.
Convert ROIs to surface meshes
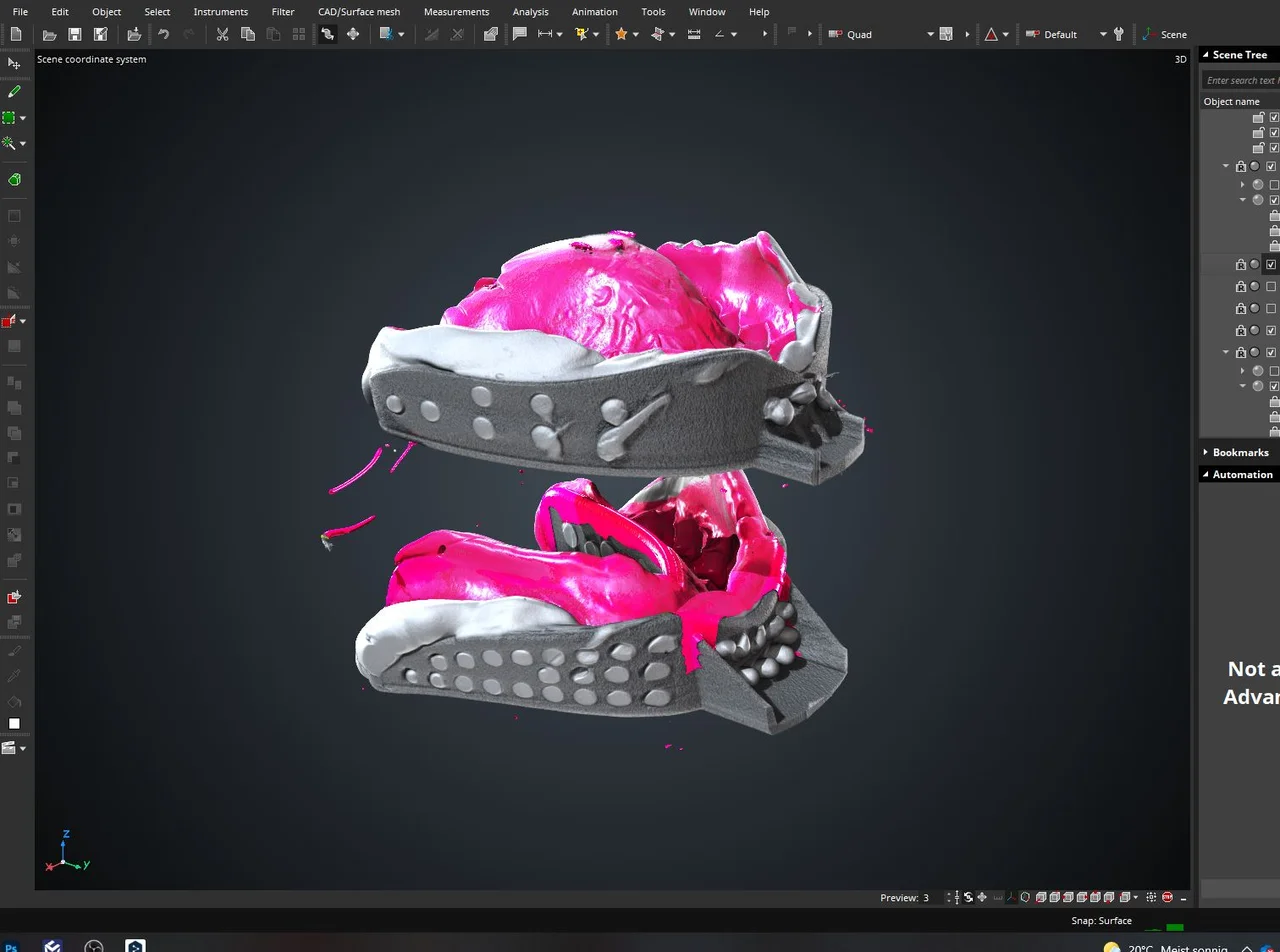
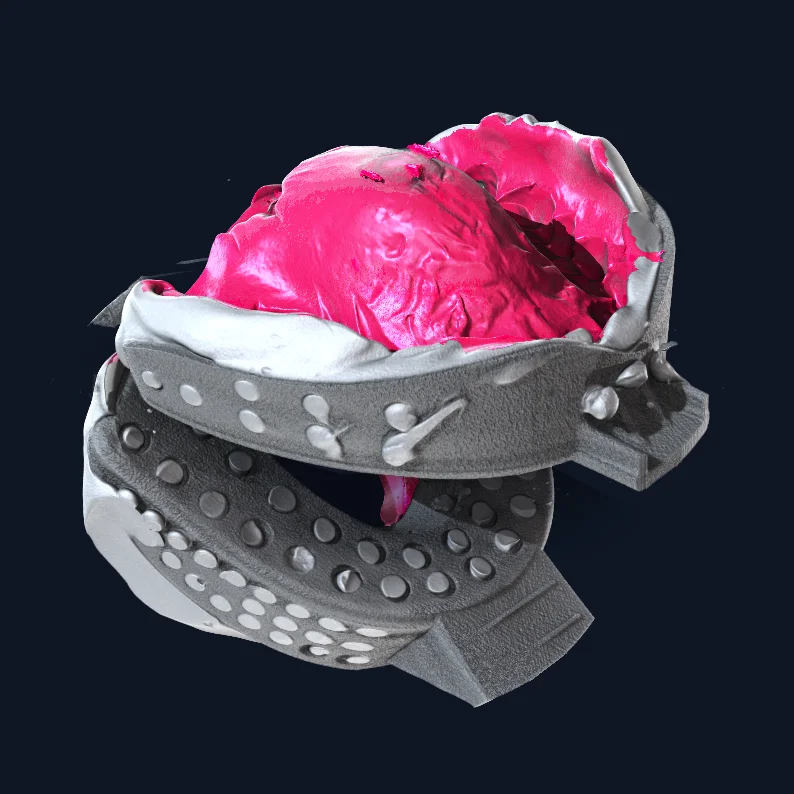
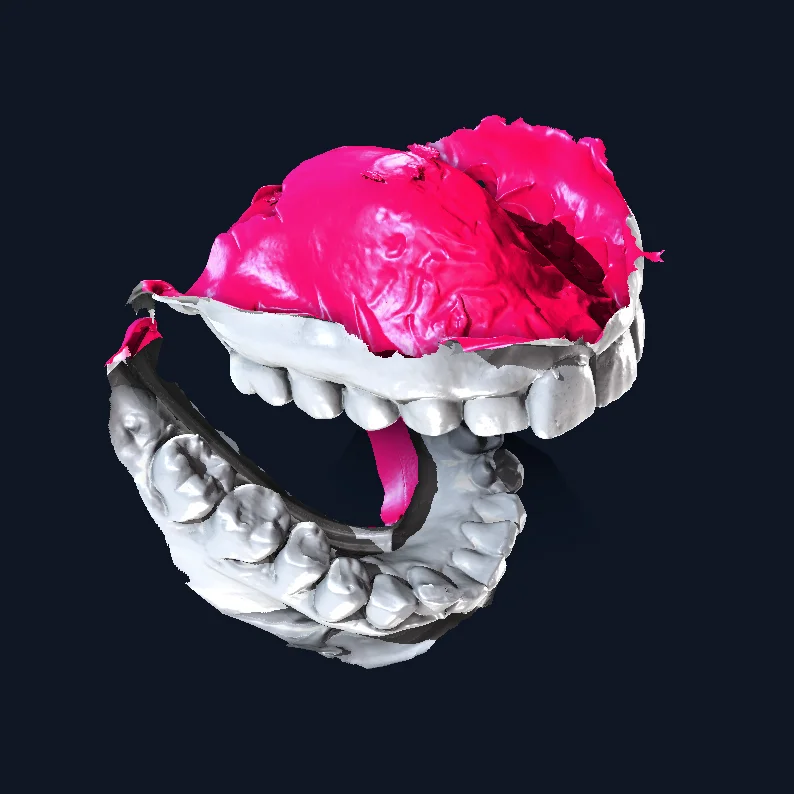
The two resulting meshes, cleaned up and ready for STL export!
VGinLine in the Spotlight
This is where VGinLINE comes into play! After we create macros in VGSTUDIO MAX, we can let them run on VGinLINE without opening the software. Plus, it is often directly connected to the scanners—that means that as soon as the scan is ready to be analyzed, the macros will be triggered, and the analysis workflow will be initiated.
Based on the analysis outcomes, VGinLINE will "choose" the next suitable macro or discard the part entirely if it does not meet requirements. It has the advantage of having multiple instances, or "workers," running for the same project.
In short, VGinLINE can do our job fully automatically and make decisions based on the quality of the part. Furthermore, workers make it easily scalable so that we can meet our cycle times. As such, it can be used to automate our STL extraction job as well.
Clean, Reliable Digital Replicas
Digital replicas are used to come up with treatment plans and, if necessary, generate different stages of alignment via 3D printing to achieve corrected tooth position. Being able to create a digital representation based on 3D-CT cuts out a chunk of unnecessary, time-consuming steps, like the plaster mold.
Perhaps you've heard of intraoral scanners! They are also accurate... and highly expensive—only 15% of dentists have them. However, they do not match our accuracy requirements for the entire set of teeth.
Putting the "STL" back in "Hustle"
Now that we have the STL file, the rest is in the hands of the dental lab technicians! They use special, medical software to create treatment plans, plan tooth corrections using aligners, or crowns, bridges, veneers, and implants.
In some cases, they create new meshes for the parts, as well, and processing these parts can also be automated. For example, at WorkNC Dental (WNCD), the new STL files are used to automatically print aligners or drill crowns. WNCD AUTO then creates and prepares a cutting project based on the metadata and, with utmost precision, defines a path for optimized cutting.
The Before & After
(or the Positive & Negative)
Ready to Learn More?
Users of VGSTUDIO MAX can find out more about freeform surfaces, visualization and rendering, and best-fit registrations in the tutorials included in the software.
Got a Story?
If you have a VG Story to tell, let us know! Contact our Storyteller Team at: storytellers@volumegraphics.com. We look forward to hearing from you.
